Create and manage volumes
Last changed: 2026-06-09
Volumes are block storage devices that you attach to instances to enable persistent storage. You can attach a volume to a running instance or detach a volume and attach it to another instance at any time. You can also create a snapshot from or delete a volume.
There are different volume types, including
mass-storage-default: Storage backed by spinning hard drives, available to everybody and is the default type.
rbd: Legacy storage backed by spinning hard drives.
mass-storage-ssd: Fast storage backed by solid state drives. This volume type is only available after access has been granted by the NREC Team. In addition, some projects have access to more specialized storage.
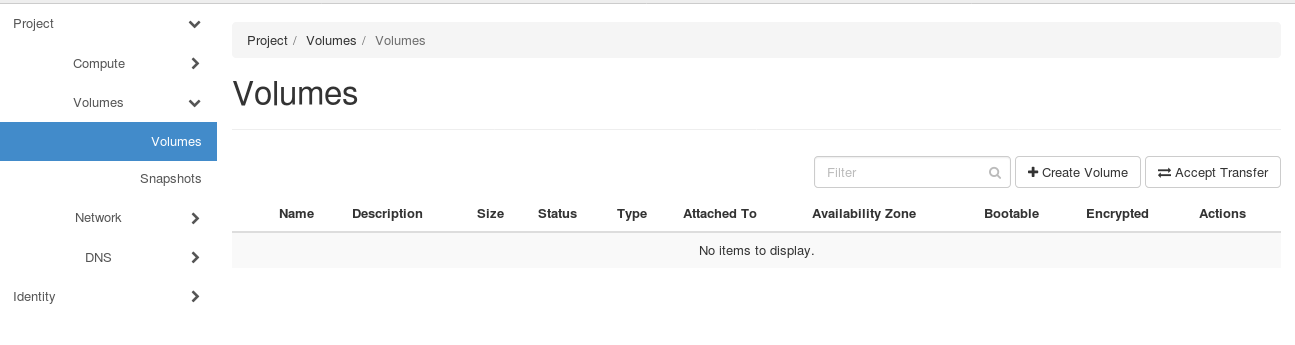
Create
In the dashboard, select Volumes in the Volumes tab:
Click on Create Volume, and the following window appears:
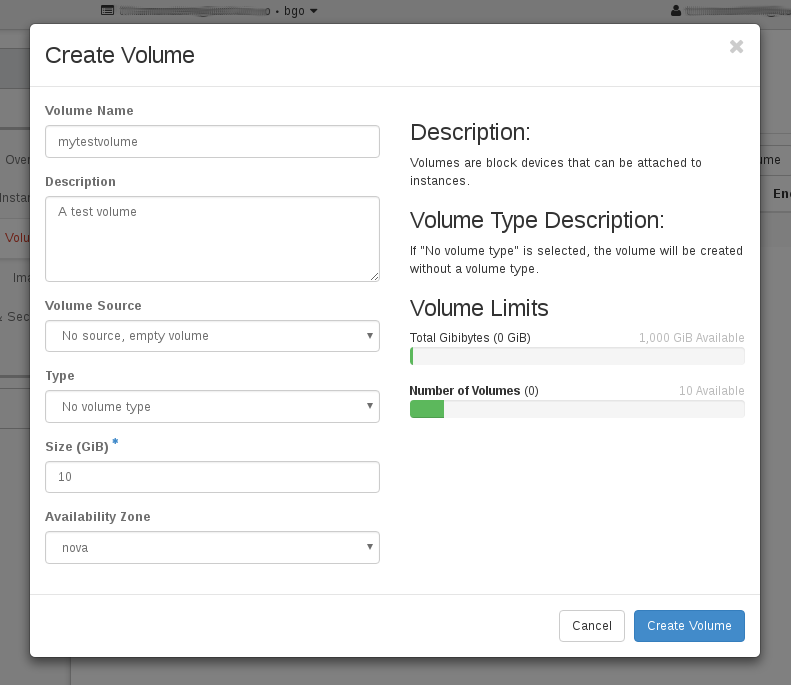
Fill in the form:
Volume Name: A name for the volume, which you will recognize (Required)
Description: An optional description
Volume Source: Either no source, i.e. an empty volume, or create a volume from an image
Type: Normally you can use the default setting - change to the desired type if you need SSD backed storage or have other special needs
Size: The size of the volume, in GB
Availability Zone: Choose “nova”
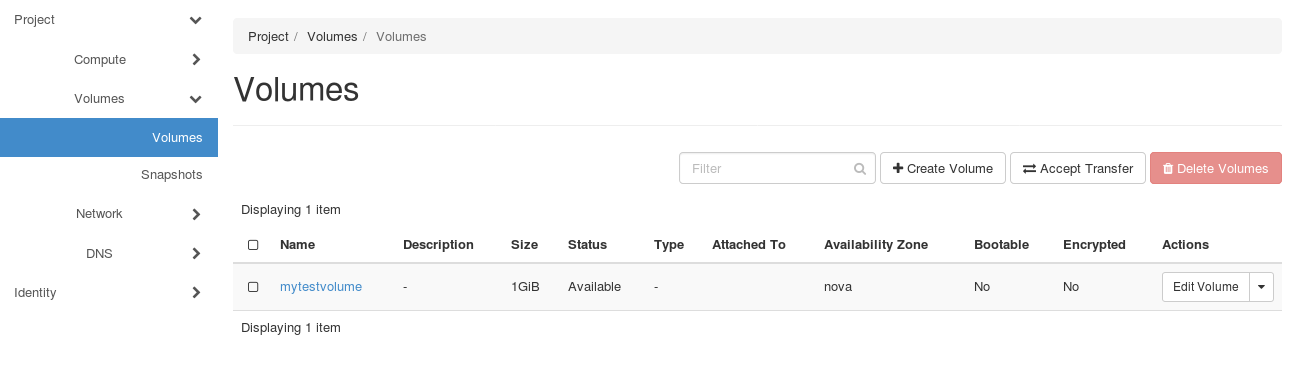
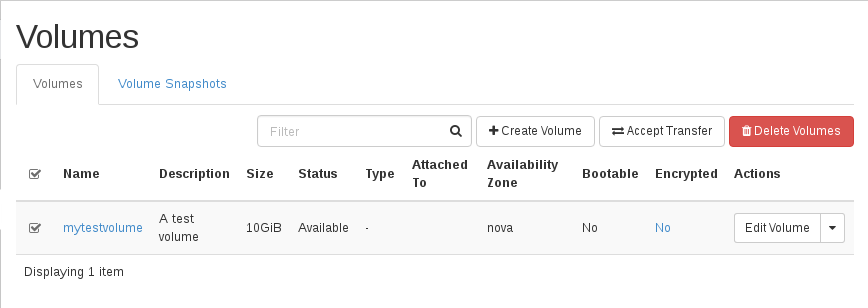
Then click Create Volume. The volume will be instantly created and
available:
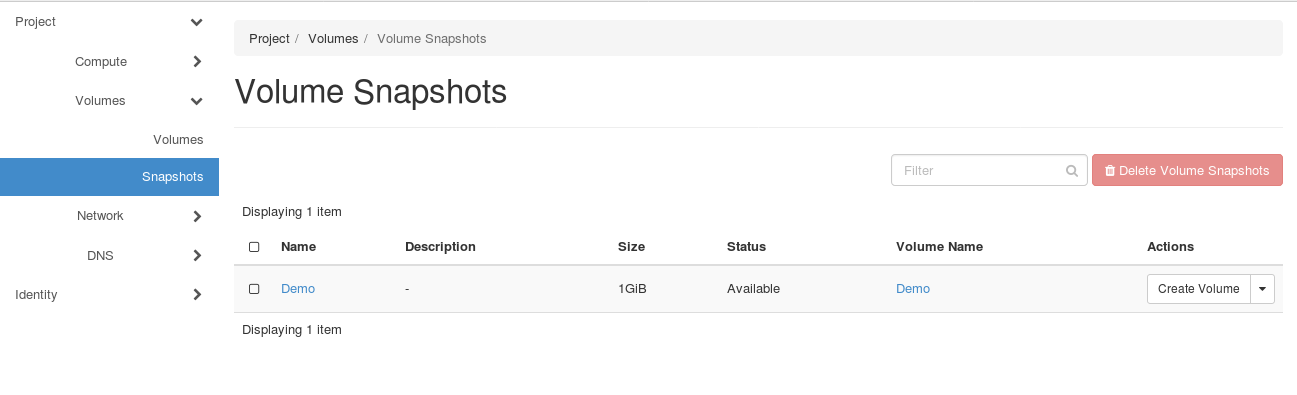
Snapshot
You can also Create Snapshot of a volume. The snapshot of the volume
will be located under Volumes tab:
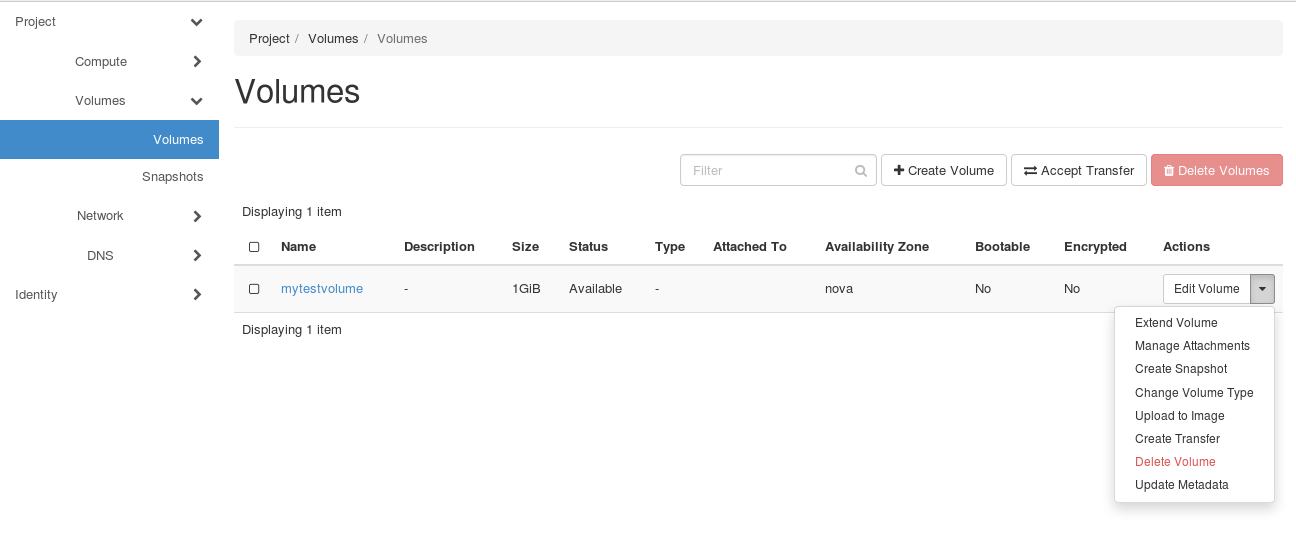
Attach
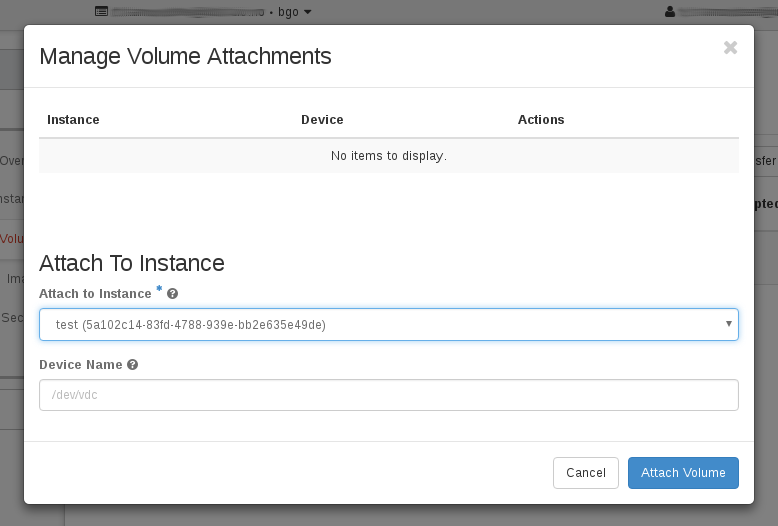
After creating one or more volumes, you can attach them to virtual machines (instances). A volume is a block storage device, and can only be attached to one virtual machine at a time. In the Volumes tab under Volumes, select Manage Attachments from the dropdown menu:
Select the virtual machine (instance) that you wish to attach this
volume to. You usually don’t need to change the device name. Then
click on Attach Volume.
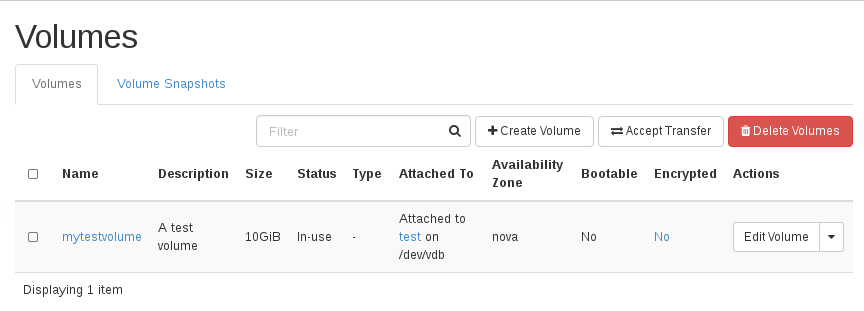
The volume is now attached to the virtual machine.
Partition, format and mount
When you have attached the volume, it can be used as a regular block device from within the virtual machine. If this is the first time using the volume, the corresponding block device in the virtual machine needs to be partitioned, formatted and mounted before it can be used. Login to the virtual machine with the root user. In the below console snippets, the commands are prefixed by # to separate them from documentation.
Identify the corresponding block device with lsblk:
# lsblk
NAME   MAJ:MIN RM    SIZE RO TYPE MOUNTPOINT
vda    253:0    0      1G  0 disk
`-vda1 253:1    0 1011.9M  0 part /
vdb    253:16   0     10G  0 disk
Here, we see that vdb is the block device corresponding to the attached volume. Note that the name of the block device (*d*) may be different than in this example (e.g., /dev/sdb for Ubuntu and /dev/sd2 for OpenBSD).
Important
Do NOT perform the next step unless this is the very first time you use this volume, and there are NO file systems on it. If you have any data on it whatsoever, skip the ‘mkfs’ command! Otherwise you will experience data loss!
If there are not any file systems in the block device, you need to
create one. We will create an EXT4 file system directly on vdb, by
running mkfs.ext4 /dev/vdb. The file system will then be formatted
to use the entire vdb block device as one partition. Then we mount the
formatted block device on /persistent01:
# mkfs.ext4 /dev/vdb
(...output omitted...)

Create a folder and mount the volume on it:
# mkdir /persistent01
# mount /dev/vdb /persistent01

Check the amount of disk space available on the file system:
# df -h /persistent01
Filesystem                Size      Used Available Use% Mounted on
/dev/vdb                  9.8G    150.5M      9.2G   2% /persistent01
Note that in order for the volume to be mounted automatically after a
reboot, you will have to add an entry to /etc/fstab:
First, unmount the block device using umount /persistent01, and
verify that it is not mounted with df -h. If the umount command
returns that the device is busy, you may run umount with -f, or
alternatively reboot the virtual machine before retrying umount again.
It is recommended to configure fstab to mount the formatted drive by
UUID: Should the block device change from /dev/vdb to /dev/vdc for
some reason, for instance, then the mount should still be valid. You
can find the UUID from blkid -s UUID.
fstab may be set up differently depending on Linux distribution and
software used to edit fstab. You can check man fstab to get an
idea of the recommended configuration. Here, we manually add the
following line to /etc/fstab to ensure a mount that is persistent
through reboots:
UUID=ca81b002-1037-4698-a0a6-03f6dd4702b0 /persistent01 ext4 defaults 0 2
To apply the mount without a reboot, run mount -a and verify that
the device is mounted with df -h /persisten01.
Last, you likely want to read and write to the volume using a non-root
user. You can change the necessary permissions to r/w to the device
using sudo from the non-root user $USER: sudo chown -R $USER:$USER
/persistent01/
Detach
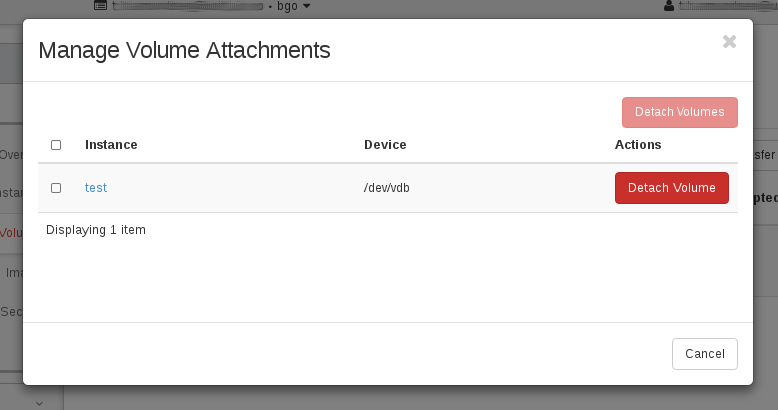
In order to detach a volume from a virtual machine (instance), select Manage Attachments from the dropdown menu in the Volumes:

Select the attachment and click on Detach Volume:
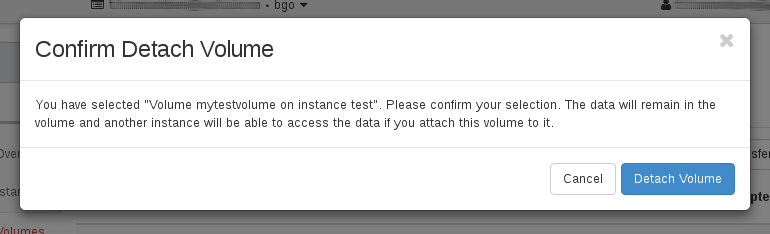
You will have to confirm this action. Click Detach Volume in the
confirmation dialog that appears:
The volume is now detached.
Re-type
It is possible to re-type a volume, for instance from mass-storage-default to mass-storage-ssd type. In that case, a re-type operation will move data physically from from spinning disks to SSDs. Re-type will not work on a volume that has snapshot(s). It should not be necessary to detach a volume before re-type. However, some workloads may run into issues because of the re-type operation. One such workload is running containers, i.e., Docker, etc. Ensure that there is enough available storage in the projects for both types. To re-type, select “Change Volume Type” in the drop-down menu for the volume. Under “Migration Policy”, select “On Demand”.
Delete
Deleting a volume is pretty straightforward. In the Volumes,
select the appropriate check boxes for the volumes that you want to
delete, and click Delete Volumes:
Then confirm your choice, click Delete Volumes:

The volume is then deleted.
Doing the same with CLI
Creating the volume:
$ openstack volume create --size 10 --description "A test volume" mytestvolume
+---------------------+--------------------------------------+
| Field               | Value                                |
+---------------------+--------------------------------------+
| attachments         | []                                   |
| availability_zone   | nova                                 |
| bootable            | false                                |
| consistencygroup_id | None                                 |
| created_at          | 2016-11-11T15:41:00.171512           |
| description         | A test volume                        |
| encrypted           | False                                |
| id                  | a7234dda-a97a-44c3-aa93-9b2952fd2bcf |
| multiattach         | False                                |
| name                | mytestvolume                         |
| properties          |                                      |
| replication_status  | disabled                             |
| size                | 10                                   |
| snapshot_id         | None                                 |
| source_volid        | None                                 |
| status              | creating                             |
| type                | None                                 |
| updated_at          | None                                 |
| user_id             | 6bb8dbcdc9b94fff89258094bc56a49f     |
+---------------------+--------------------------------------+
Listing the servers and volumes:
$ openstack volume list
+--------------------------------------+--------------+-----------+------+-------------+
| ID                                   | Display Name | Status    | Size | Attached to |
+--------------------------------------+--------------+-----------+------+-------------+
| a7234dda-a97a-44c3-aa93-9b2952fd2bcf | mytestvolume | available |   10 |             |
+--------------------------------------+--------------+-----------+------+-------------+

$ openstack server list
+--------------------------------------+----------+--------+----------------------+------------+
| ID                                   | Name     | Status | Networks             | Image Name |
+--------------------------------------+----------+--------+----------------------+------------+
| 5a102c14-83fd-4788-939e-bb2e635e49de | myserver | ACTIVE | public=158.39.77.147 | Fedora 24  |
+--------------------------------------+----------+--------+----------------------+------------+
Attaching the volume to the server:
$ openstack server add volume myserver mytestvolume
You may also use the IDs of the server and volume instead of the names.
Confirming that the volume is attached:
$ openstack volume list
+--------------------------------------+--------------+--------+------+-----------------------------------+
| ID                                   | Display Name | Status | Size | Attached to                       |
+--------------------------------------+--------------+--------+------+-----------------------------------+
| a7234dda-a97a-44c3-aa93-9b2952fd2bcf | mytestvolume | in-use |   10 | Attached to myserver on /dev/vdb  |
+--------------------------------------+--------------+--------+------+-----------------------------------+
Partition, format and mount: See the relevant above section.
Detaching the volume:
$ openstack server remove volume myserver mytestvolume
Re-type the volume:
$ openstack volume set --type mass-storage-ssd --retype-policy on-demand mytestvolume
Deleting the volume:
$ openstack volume delete mytestvolume
Confirming that the volume is deleted:
$ openstack volume list