Create a Windows virtual machine
Last changed: 2026-06-09
Caveats and Limitations
NREC as a platform does not offer Windows specific services that you may find in large commercial clouds, like Microsoft Azure and Amazon AWS. There are a few things to consider when running Windows in NREC, compared to e.g. Linux, mostly due to the need for graphical console and the fact that Windows is a commercial product that needs licensing to work securely over time.
The following is a list of caveats and limitations that you should keep in mind when considering running Windows in NREC:
NREC does not (mostly) license its hypervisors for running Windows. Microsoft offers updates for unlicensed Windows hosts for a short period of time. If your Windows instance should exist for longer than that, you will need to supply your own license for it in order to receive updates.
There is an exception for UiB users, who may get access to the win flavor. Instances of this flavor will run on licensed hypervisors in the BGO region.
NREC offers basic VNC for remote console access. This is a simple service that does not provide advanced remote display functions. You should set up remote access via RDP, which is superior to the NREC console. For even more advanced remote display functions such as GPU acceleration, consider Virtual Desktop Infrastructure (VDI) at UiO
Because of Windows’ rather steep resource demands, a demo project will have insufficient disk quota to launch windows instances. You will need another project with higher quotas in order to run Windows. Ask for access to the d1 or win flavors.
An SSH server is automatically configured and started in your Windows Instance. It takes some time from the instance appears configured until it is actually finished. Be patient if you want to start an SSH session to your Windows instance.
If you want to create a snapshot of a Windows instance as a base for new instances, you must run
sysprep.exewith specific parameters in order for any instances launched from the snapshot to work correctly. The procedure with the necessary parameters is described on this page.The NREC platform supports Windows Server Standard Edition only. If you need other variants like the Core Edition, please let us know. For supported windows versions, see nrec-gold-images
Setting up a keypair
For Windows instances SSH keys may be used to retreive a random generated password or to create an SSH session to the instance. Either way you will need an SSH keypair to go with your Windows instance. Refer to create-virtual-machine for more information on how to create an SSH keypair.
Create a virtual machine
Once you have an SSH keypair defined, you can proceed with creating a virtual machine (instance). In the Project tab, select Instances:
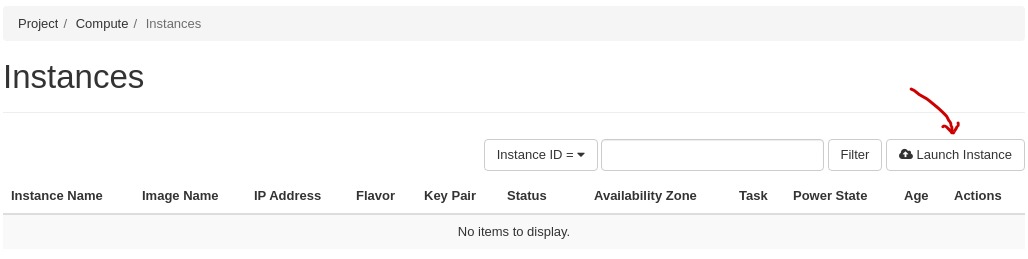
Click “Launch Instance”. The following window will appear:
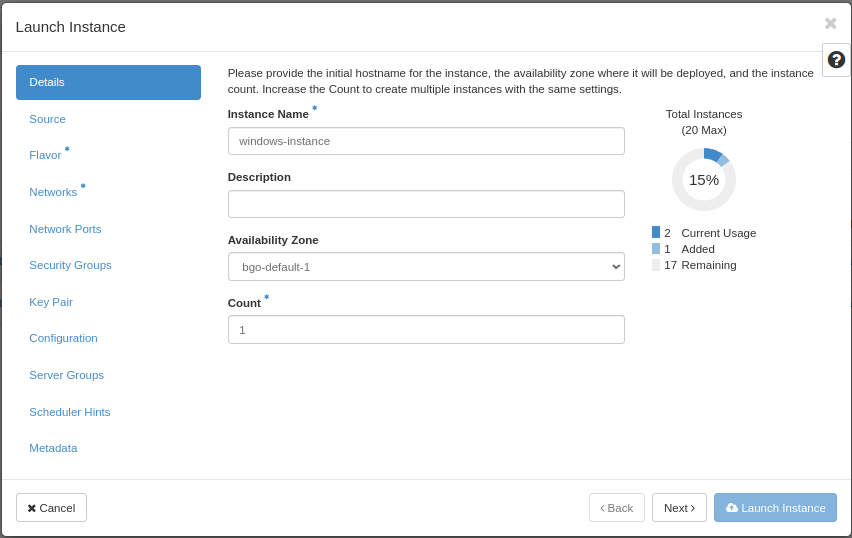
In this window, enter the following values:
Instance Name: Select a name for your new virtual machine
Availability Zone: bgo-default-1 or osl-default-1 (based on region)
Instance Count: How many virtual machines to create (usually only 1)
When finished with this tab, select the next, “Source”:
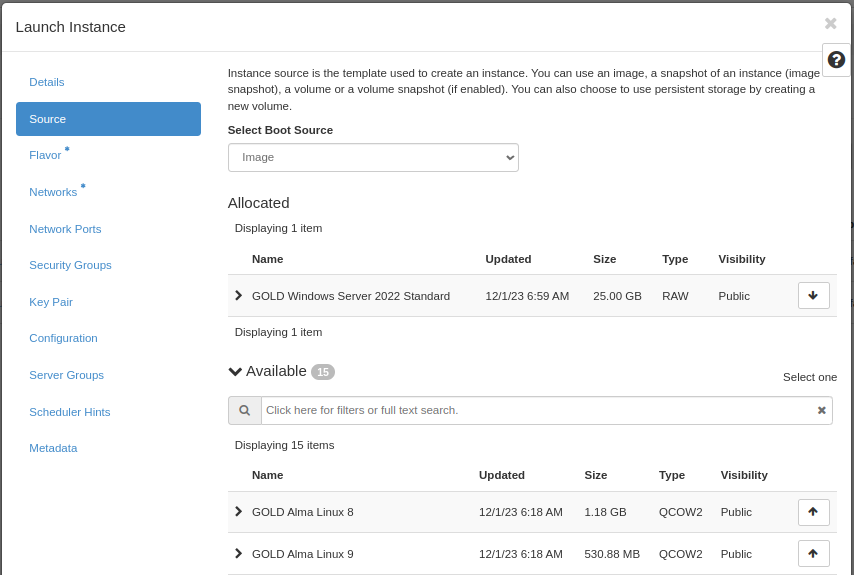
Select Boot Source should be left at “Image”, which is the default. In this case, the virtual machine will boot from a standard cloud image. When selecting this option, you can choose from a list of images. In our example, we have selected “GOLD Windows Server 2022 Standard”.
When finished with this tab, select the next, “Flavor”:
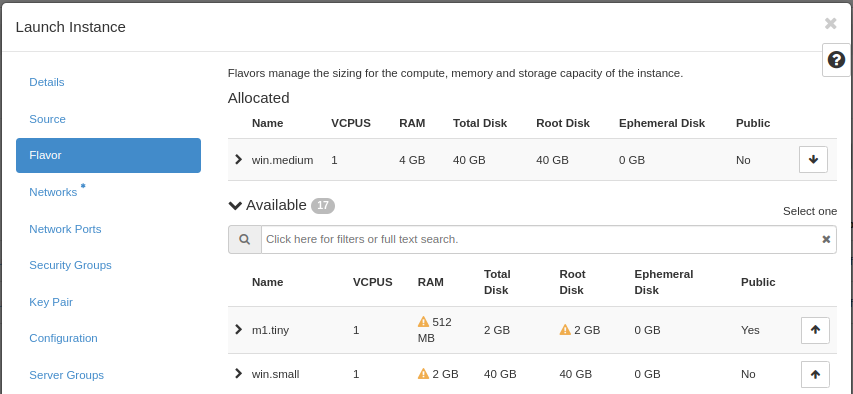
This is where you select the flavor for the virtual machine, i.e. a pre-defined set of compute resources. In our example, we’ve selected the “win.medium” flavor, which is enough to run our Windows instance. By default, you don’t have access to this flavor. Ask in your project request, or post a support case.
When finished with this tab, select the next, “Networks”:
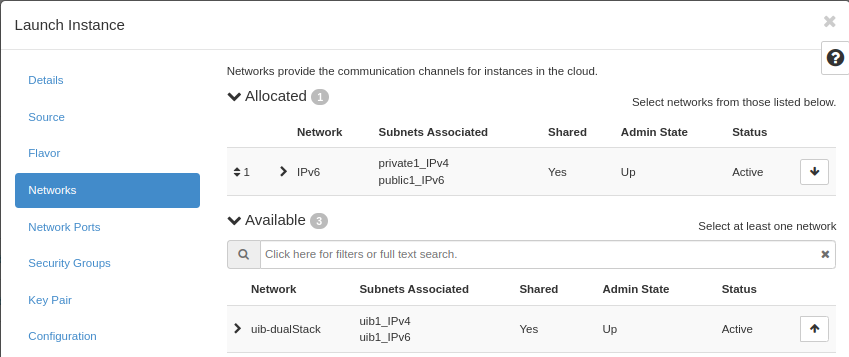
In NREC, there are two networks to choose from, “dualStack” and “IPv6”. Both networks provide a public IPv6 address, so the difference lays in IPv4.
IPv6 provides a “private” IPv4 address (RFC 1918), which gives the instance outbound IPv4 connectivity through NAT
dualStack provides a public IPv4 address and a public IPv6 address.
For more information, see IPv6 or dualStack.
Note
Only one network!
The instance will not work correctly if more than one network is applied. Only choose one of IPv6 or dualStack.
If unsure, choose IPv6. Our IPv4 address space is very limited. Login hosts at UiO and UiB have IPv6 configured, and can be used to manage your instances via IPv6.
When finished with this tab, you can optionally add security groups. In our example, we skip this stage (we will create and add security group later)
Select the “Key Pair” tab:
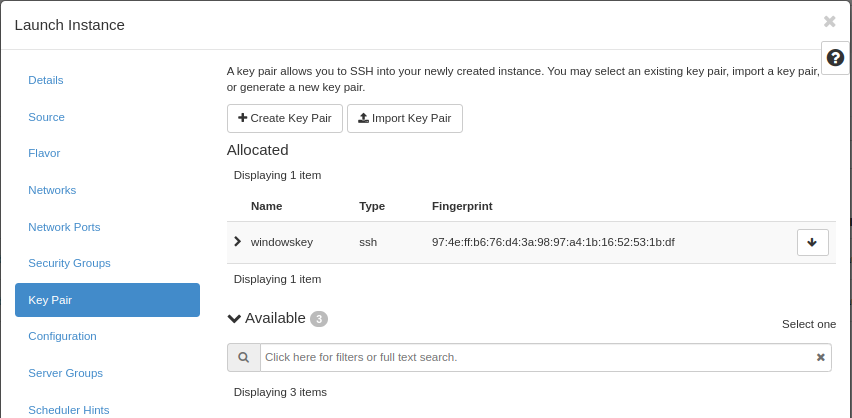
Here, choose an SSH keypair you want to assign to this virtual
machine for password retrieval and SSH login. In this example, we have created
a new SSH key pair, and we have downloaded the .pem-file to our local computer,
naming the private key windowskey.pem.
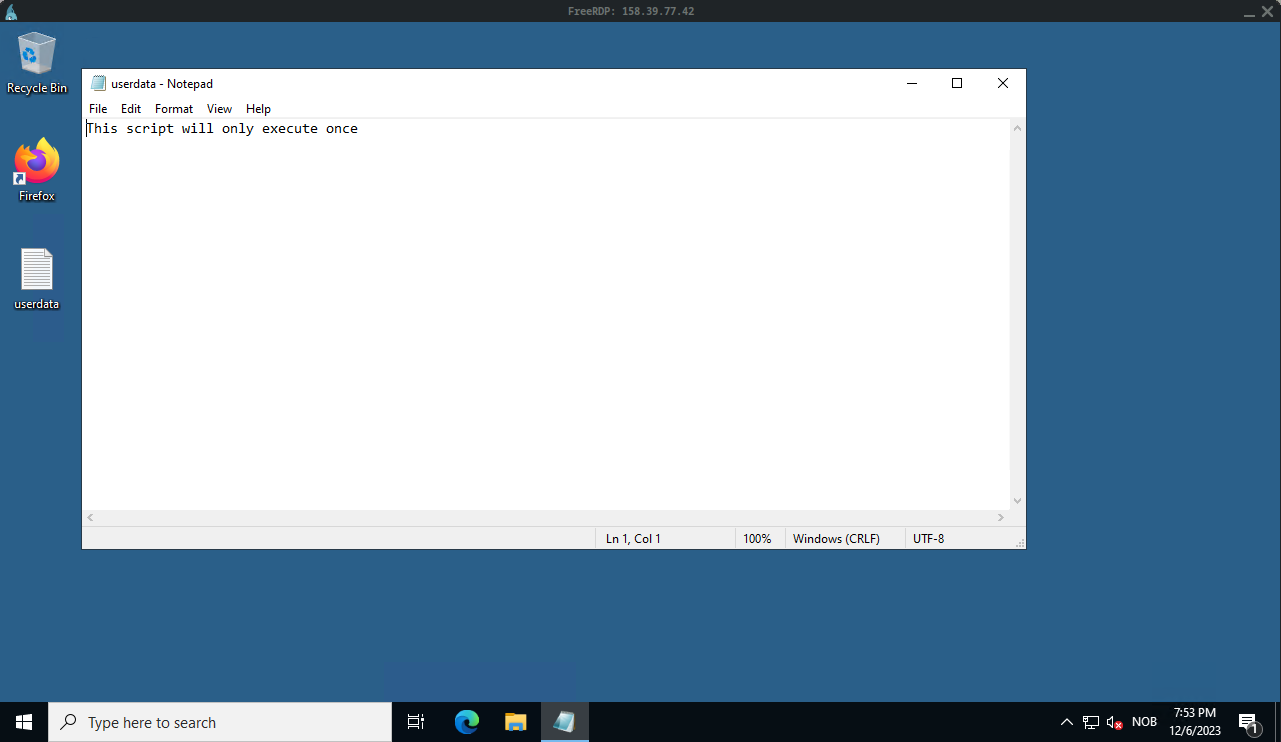
Optionally, you may specify a one shot configuration to be executed when the instance starts for the first time. In this example we want to execute a simple powershell script.
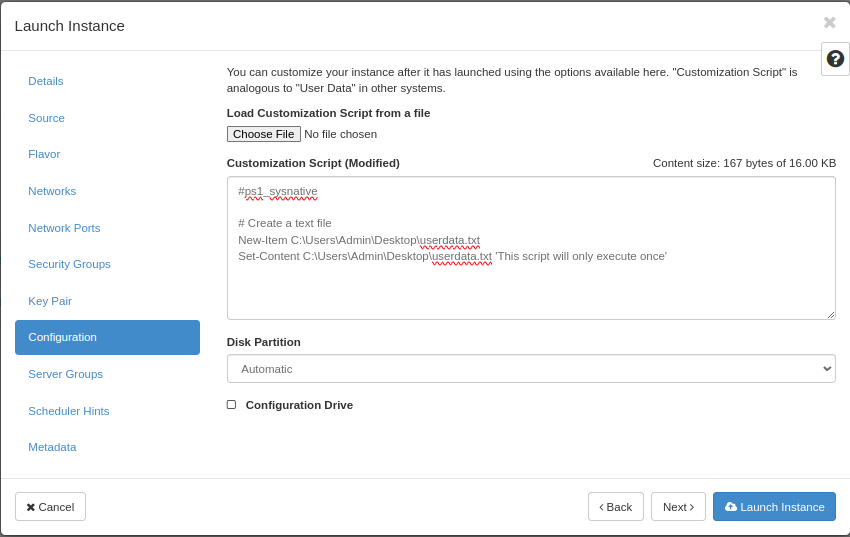
When satisfied, clik “Launch Instance” to create your virtual machine.
Allowing RDP access
Tip
An SSH server is automatically configured and started in your Windows Instance. You will have to create a security group that opens for port 22 in order to access the service. Unlike on linux instances, the username is “Admin”. When you ssh into your Windows instance, you will start in a CMD shell. If you want powershell instead, just type “powershell”
While we wait for our virtual machine to be created and configured, we can create a security group for the Remote Desktop protocol in order to grant ourselves access to the new virtual machine:
Select the “Access & Security” tab and select “Create Security Group”:
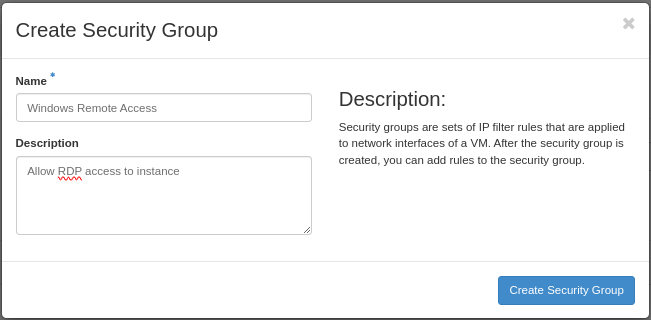
Here, enter a name and optionally a description, then click “Create Security Group”. Click “Manage Rules” on your newly created security group, then “Add Rule”:
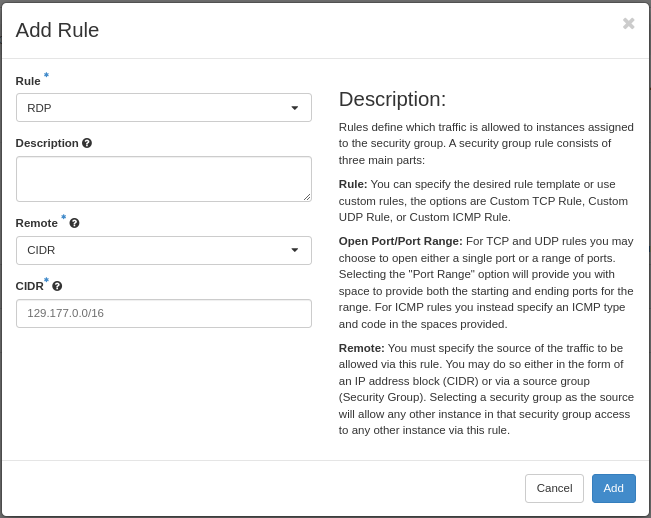
“RDP” is pre-defined in the system, so select that from the menu. In this example we limit access to an IPv4 CIDR mask corresponding to the campus network for The University of Bergen. Click “Add”. Please refer to Working with Security Groups for more information on this important topic.
Important
Unlike linux instances, the Windows instances have both an internal “Windows Firewall” and external security groups. By default the internal “Windows Firewall” has the ports for SSH open, but you still have to create the proper security groups and associate them with the instance in order to consume the services.
Warning
In the wake of recent security conserns about the RDP protocol we have been forced to limit the internal Windows Firewall to only allow connections from the campus networks of the universities of Bergen and Oslo (for IPv4 and IPv6). If you are not situated on one of the campuses’ network, you will have to use a VPN service. Specificially, we have modified the rules “Remote Desktop - User Mode (TCP-In)” and “Remote Desktop - User Mode (UDP-In)”.
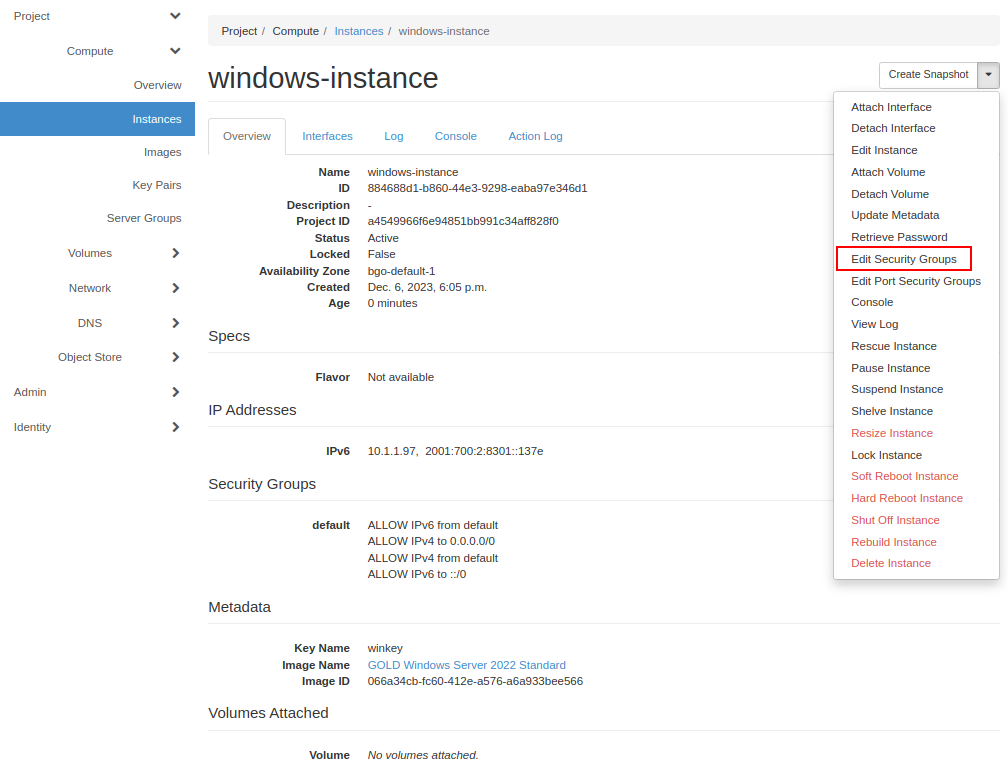
If the instance is ready, we can now assign our new rule to the virtual machine. Click on your instance in “Instances” tab, then select “Edit Security Groups”:
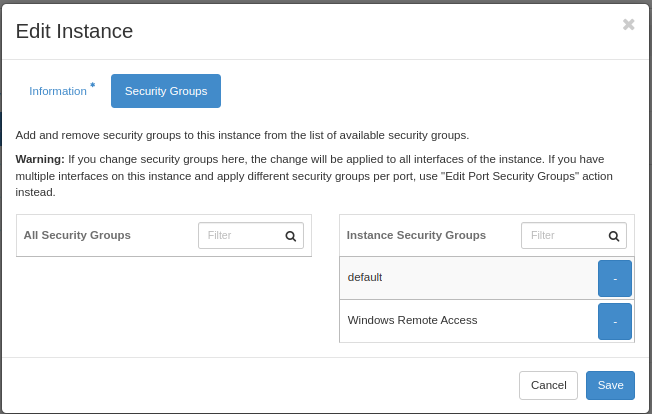
Click on the plus sign associated with our new rule, so that the rule moves to the right hand box, “Instance Security Groups”, then click “Save”:
Optionally, you can also add a rule for ICMP access, so that you can ping the instance. This is described in the previous chapter, “Create a Linux virtual machine”
Retrive Admin password
Tip
See below for how to set the Admin password instead of retrieving it
The local “Administrator” account is disabled by the system a short while after your instance is spawned. “Admin” is the only account available for logon.
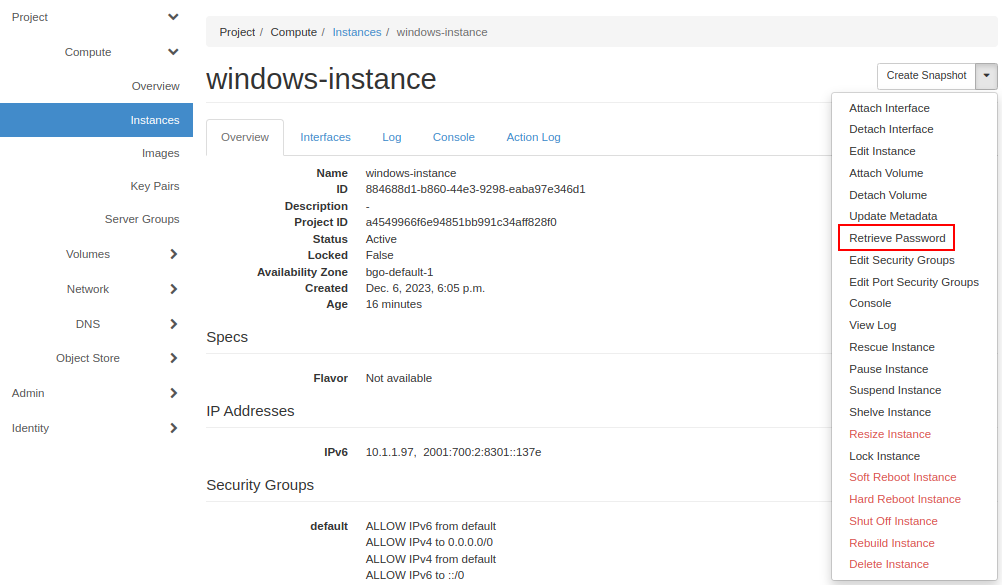
We are now almost ready to log on to our new Windows virtual machine, but first we must retrieve a password.Select “Retrieve Password” from the drop down menu:
Important
It takes a while until the password retrieval feature is ready in a newly launched instance - please be patient. Until the system is ready, the Retrieve Instance Password will tell you “Instance Password is not set or is not yet available”
When the system is ready to decrypt your password, you will be asked for your private key. In this case we click “Choose File” and point to the .pem file we downloaded when we created the key pair:

When you click “Decrypt Password”, the password will be shown in the “Password” field.
Tip
You can retrieve the passord from the command line, using the “nova” client. The openstack client has not yet implemented this feature. Both the openstack and nova client can be installed with pip in a python virtual environment. The packages are called python-openstackclient and python-novaclient. Since they both rely on the UNIX-style openrc format to set environmental variables, they are most easily accessed in Windows from inside WSL. Every instance has a name and ID:
$ openstack server list
+--------------------------------------+------------------+--------+----------------------+-----------------------------------+
| ID                                   | Name             | Status | Networks             | Image Name                        |
+--------------------------------------+------------------+--------+----------------------+-----------------------------------+
| e88b1380-65a5-4975-9338-7213d8df47f2 | windows-instance | ACTIVE | public=158.37.63.197 | GOLD Windows Server 2022 Standard |
+--------------------------------------+------------------+--------+----------------------+-----------------------------------+
Now you can use the name or ID to retrieve your password:
$ nova get-password e88b1380-65a5-4975-9338-7213d8df47f2 /home/user/windowskey.pem
ceq26oGb2xw8RQR3Gcdn
If your private key is password protected, you will be asked for the password. If the system is not yet ready to give you the password, you will receive no output at all. Wait a while and try again.
Important
If you have a password protected private key, you must use the nova command line client, as this feature is unavailable in the dashboard.
Set Admin Password
It is not necessary to retrieve the password as described above. If you wish to set the password for the “Admin” account instead, you may do so via SSH (provided you created a security group that opens for SSH access). To set the password via SSH, use the following command:
$ ssh -l Admin -i <ssh-key> <ip-address> net user Admin <password>
In the command above, replace:
<ssh-key>should be the private part of the ssh key used when creating the Windows instance, e.g. “windowskey.pem”<ip-address>is the IPv6 or IPv4 address of the instance<password>is the new password
In the example below, we use pwmake to generate a password, and proceed to set the new password for the Admin account:
$ pwmake 96
iDyS+UqePIwoqOhariK0m

$ ssh -l Admin -i ~/.ssh/windowskey.pem 2001:700:2:8201::2a3c net user Admin 'iDyS+UqePIwoqOhariK0m'
The command completed successfully.
Launch Remote Desktop
When you have retrieved the password, you are ready to log on. For example, from a linux client:
$ xfreerdp /cert:ignore /w:1280 /h:1024 /kbd:Norwegian /u:Admin /p:ceq26oGb2xw8RQR3Gcdn /v:158.37.63.197
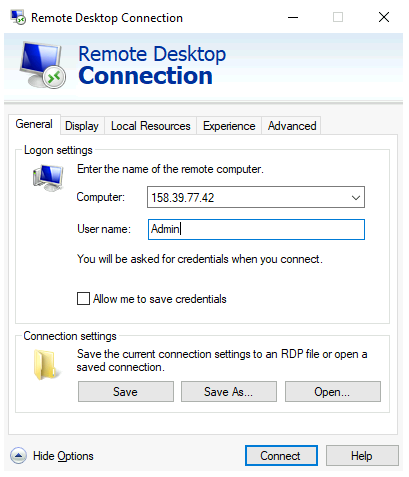
This will create a session with a fixed size (the “/w:” and “/h:” options), and Norwegian keyboard layout with the user “Admin”, which is an account that is automatically created in the virtual machine. From a windows machine, you can launch “Remote Desktop Connection”:
Congratulations! You now have a virtual machine running Windows. You can now proceed to create and mount volumes and install software:
Creating a snapshot image
A Windows instance has specific and necessary steps needed to be taken if you intend to use your snapshot as a base image for new instances:
Before running
sysprep.exe, you must have restarted the instance at least once after the initial login with the Admin user.sysprep.exeneeds elevated privileges. In order to get an elevated shell, start powershell.exe with the “Run as Administrator” option. The procedure will not work without elevated privileges.To circumvent an IPv6 bug, and to rearm Cloud Init to initialize on the next boot, run
sysprep.exein the following manner (in the elevated powershell):PS C:\Users\Admin> $unattendedXmlPath = "c:\Program Files\Cloudbase Solutions\Cloudbase-Init\conf\Unattend.xml" ; ipconfig /release6 ; c:\windows\system32\sysprep\Sysprep /generalize /oobe /shutdown /unattend:"$unattendedXmlPath"
If you have connected to your Windows instance over the IPv6 protocol, your connection will now be broken. Sysprep should do its job regardless, and after a while the windows instance will shutdown. You can then proceed to create your snapshot.